Android v2rayNG: YiLuProxy IP port forward settings
Ⅰ. YiLuProxy Settings:
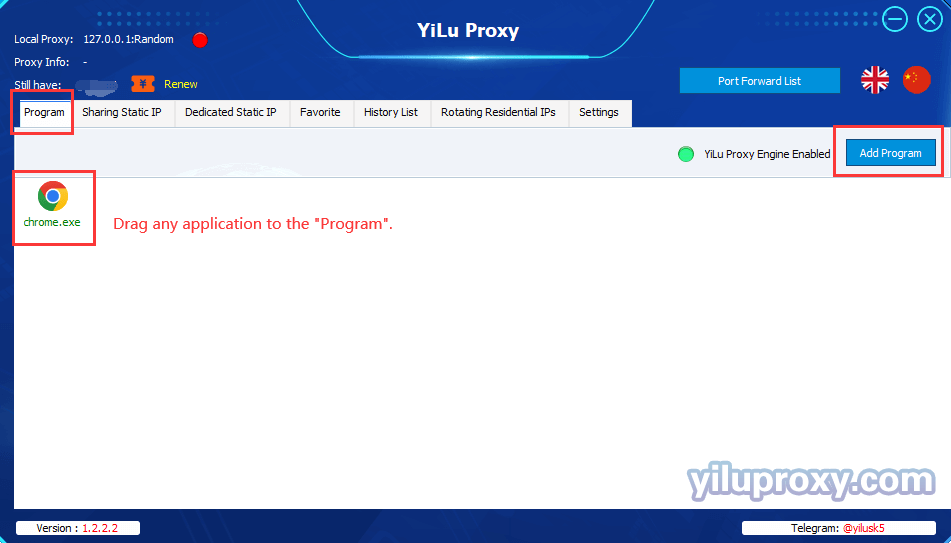
1.YiLu “Program”: Drag any application to the “Programs” TAB, such as the Chrome browser;
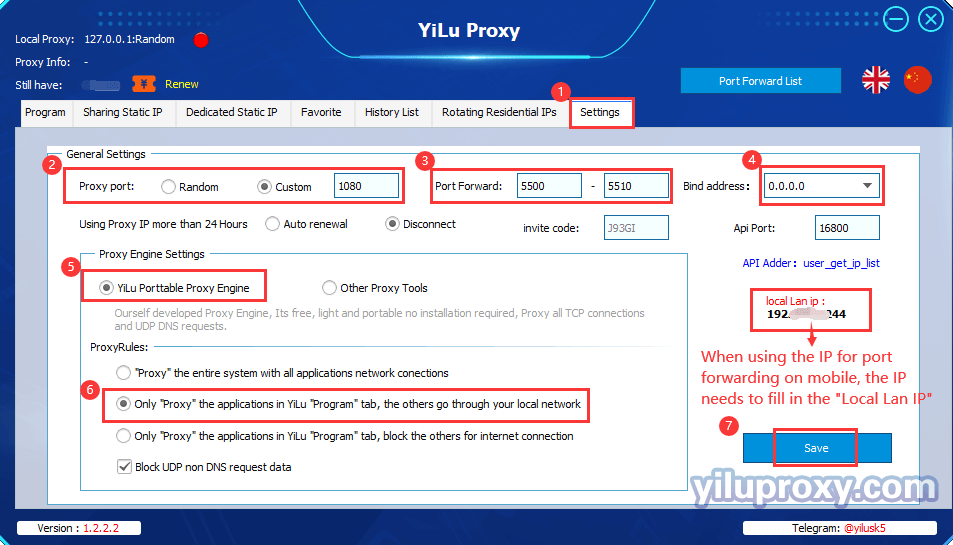
2.YiLu “Settings”:
① Proxy Port: Random and Custom are both OK;
② Port Forward: Set the port range according to your needs. For example, if you choose 5500 to 5510, that means the user can forward multiple ports at the same time, and every port should be set to an independent IP;
③ Bind address: Choose 0.0.0.0, if you are using it on the phone;
④ Proxy Engine Settings: Choose the “YiLu Porttable Proxy Engine”;
⑤ Set the other settings by default;
⑥ Click “Save”.
Note:
① The “Local Lan IP” is the “address” that you need to fill in on v2rayNG, you can check it on YiLu’s setting page;
② The phone must be on the same LAN as the YiLu client. If it cannot be connected, turn off the local firewall.
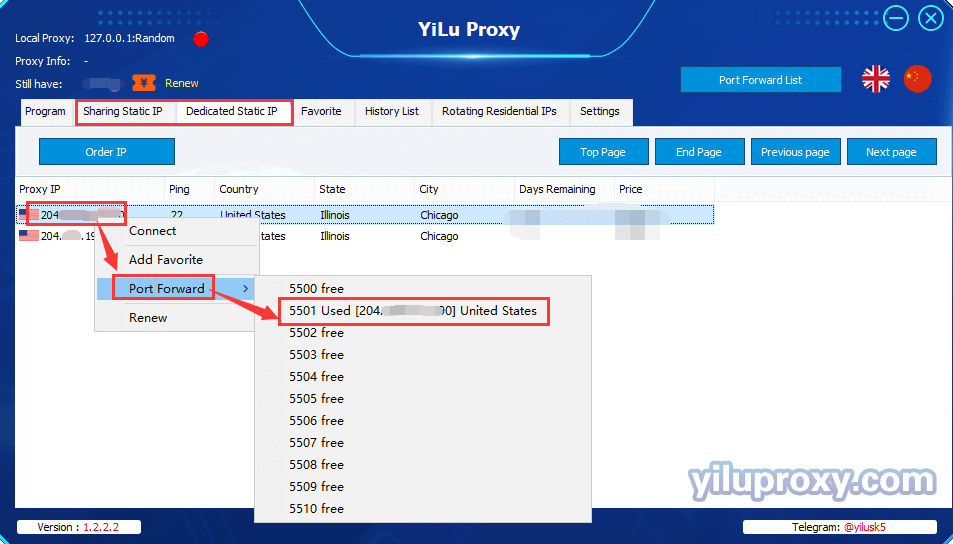
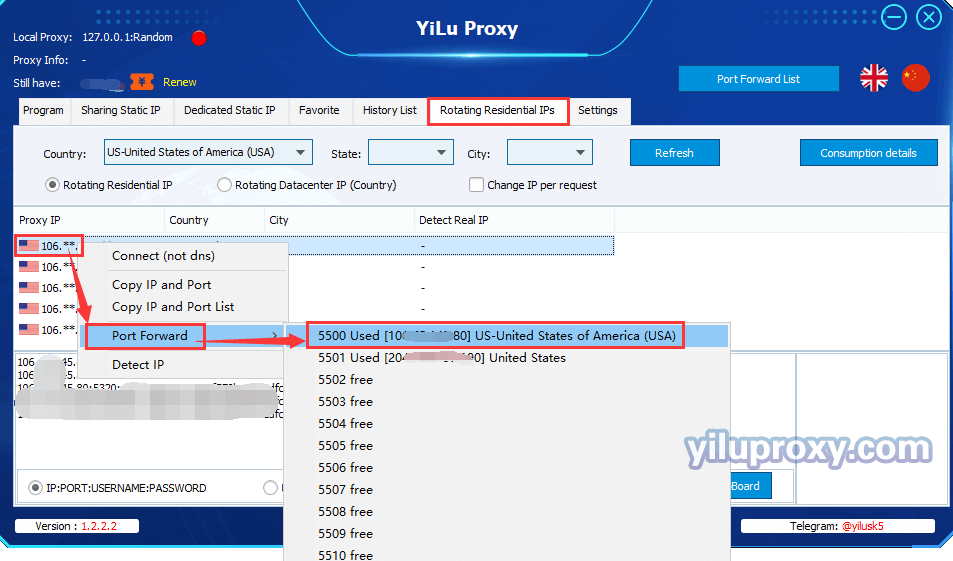
3.IP Port Forward (Sharing/Dedicated Static IP, Rotating Residential/Datacenter IPs):
① Choose an IP;
② Right-click to choose the “Port forward”;
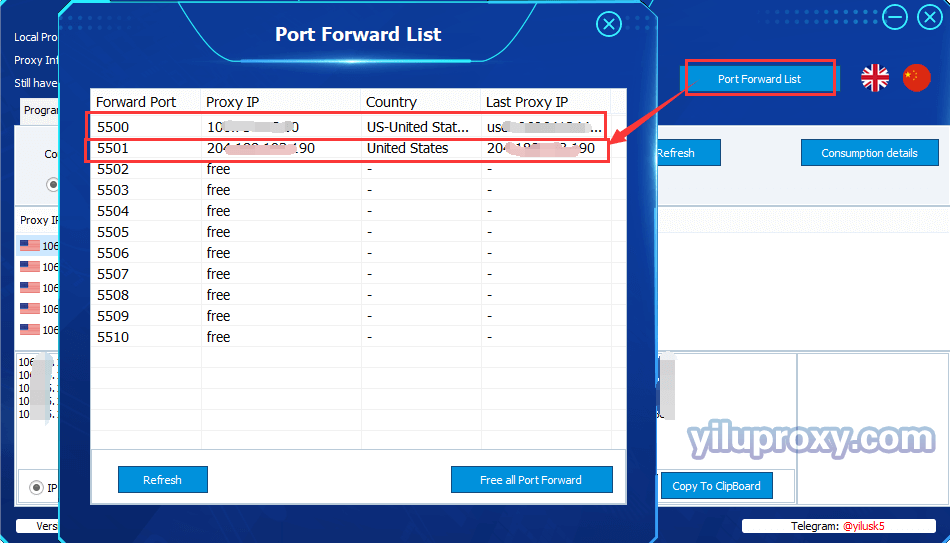
③ Choose a “Port” for the IP which you want to fill in it in v2rayNG, you can also check the IP and port information on “PortForwardList” in the YiLu client.
Note:
① Used means the port sets the IP, Free means the port is idle and it's not set the IP;
② All IP port forwarding settings are the same;
③ The below screenshots are example of the Static IP, Rotating IPs, and PortForwardList.
Ⅱ. v2rayNG software settings:
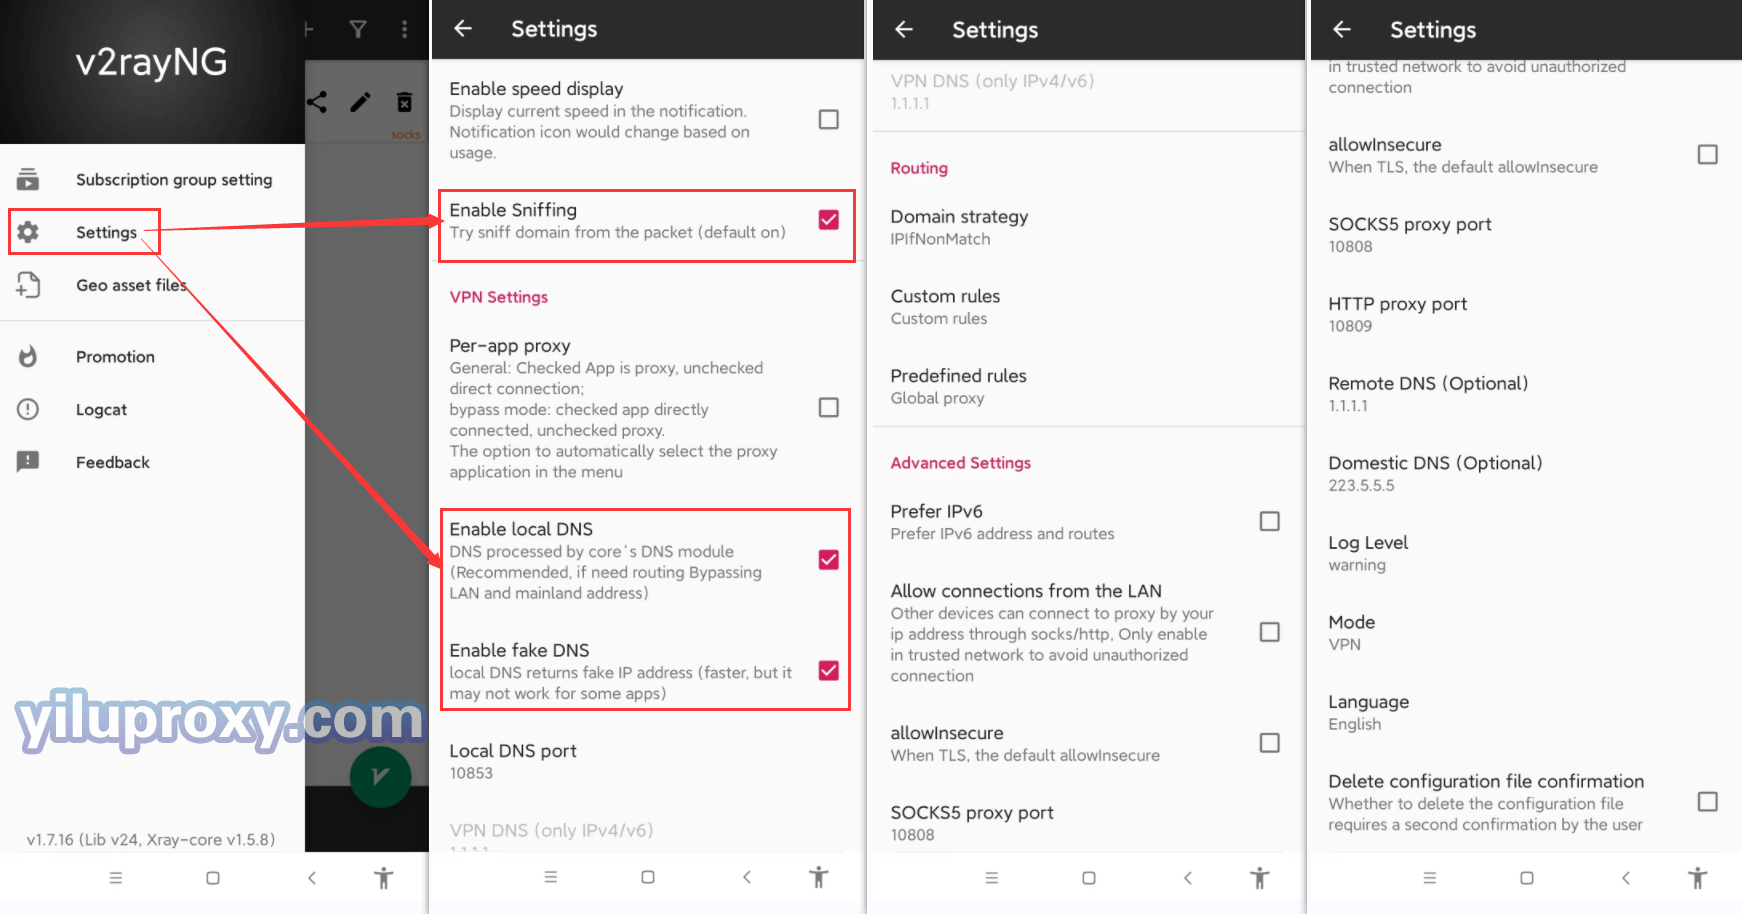
1.Open v2rayNG software on your phone, click the “settings” to set it;
2.Enable the settings of the “Enable Sniffing”, “Enable local DNS”, and “Enable fake DNS”, for other settings just set as default;
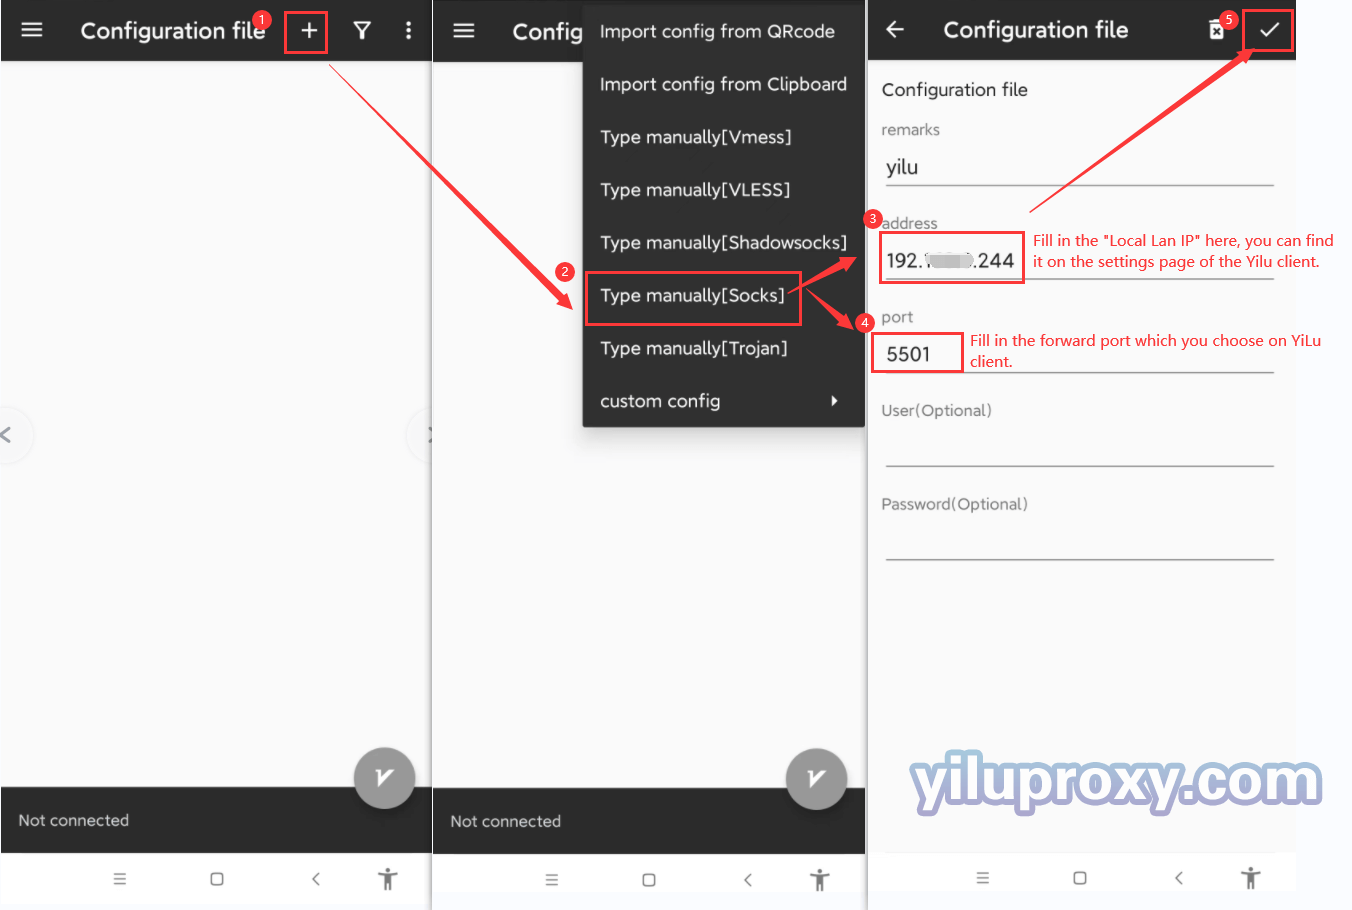
3.Click “+” in the upper right corner to add the configuration file;
4.Choose “Type manually [Socks]” to set the Proxy;
5.Remarks: just fill in it for your needs;
6.Address: Fill in the “Local Lan IP”, you can find on the settings page of the YiLu client;
7.Port: Fill in the forward port which you choose for the YiLu client;
8.The User and Password can be blank;
9.Click "√" to save the proxy;
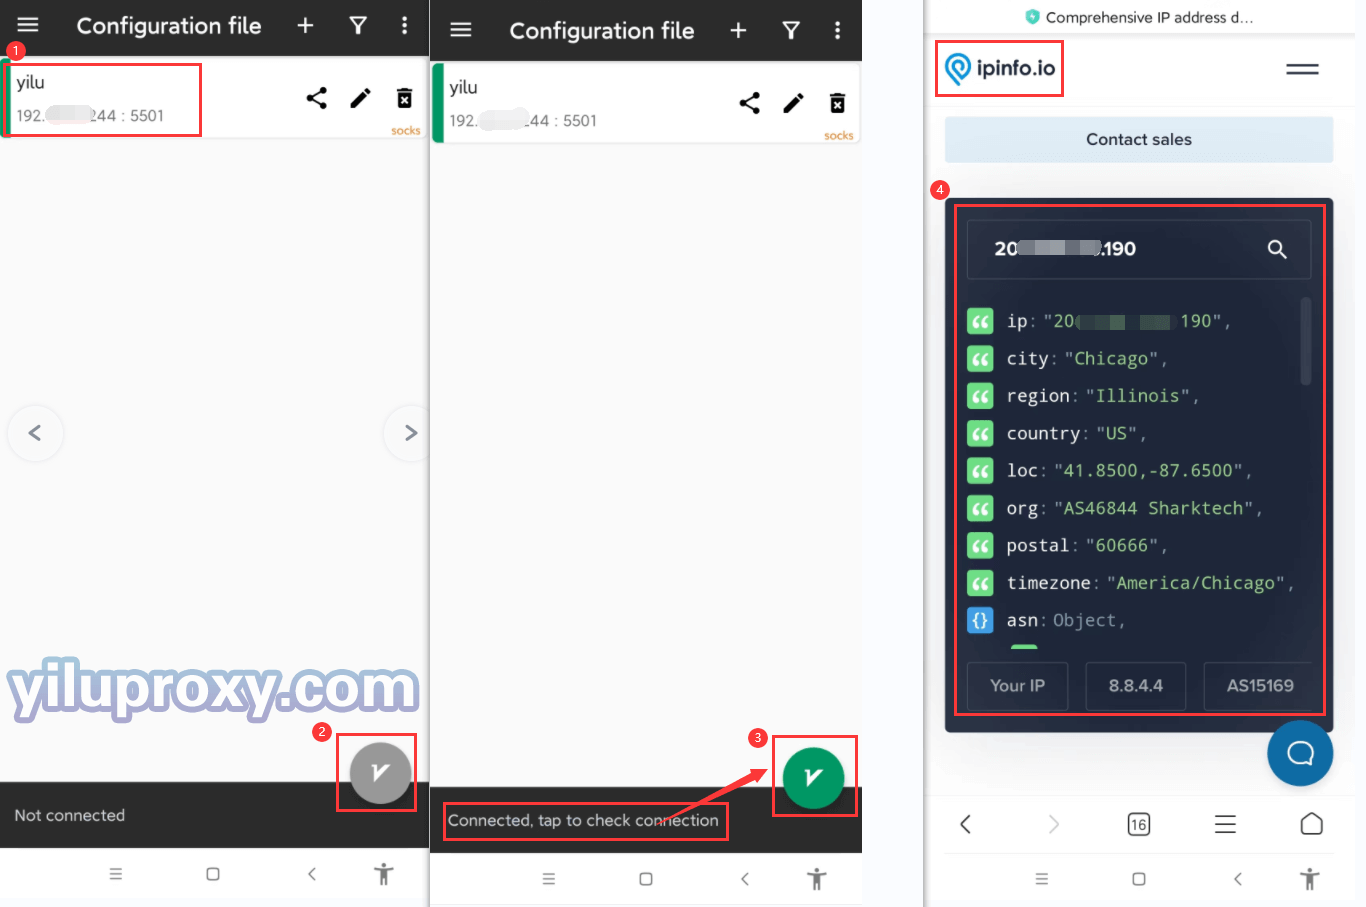
10.Click the icon “ ” to connect the proxy that you added, After the connection is successful, the icon will change to the green “
 ”, and you will see “Connected” ;
11.Open the detect website of the ipinfo.io to check that the current IP is the same as you set by YiLu.
12.The setting is successful and you can start to operate your business.
Note:
This tutorial supports all Android systems.